When emailing reports, there are a couple options:
1. Print and sign the report. Then scan it, compile it to a PDF, and email it.
2. Insert a digital signature in Bugbase once, and save signed PDFs without any extra steps.
To create a digital signature, first sign a piece of paper, and scan the image into any photo editing software (such as Paint). Scan the image at 300 DPI, and crop the signature as closely as possible. We recommend cleaning up any distortion/discoloration caused by your scanner and make as much of the white-space around the signature as pure white as possible, otherwise you will end up with discoloration around the signature (see below comparison).

Once you have scanned the signature, you must save it as a Bitmap (.bmp) file on your computer. Some software will default to saving as a Jpeg (.jpg) file (or a .png file), but saving the image as anything other than a .bmp format will cause problems when printing.
Once your scanned signature is formatted properly, you can upload it to Bugbase.
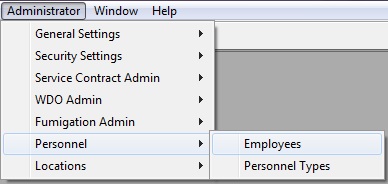
To add an employee’s signature in Bugbase, go to: Administrator > Personnel > Employees.
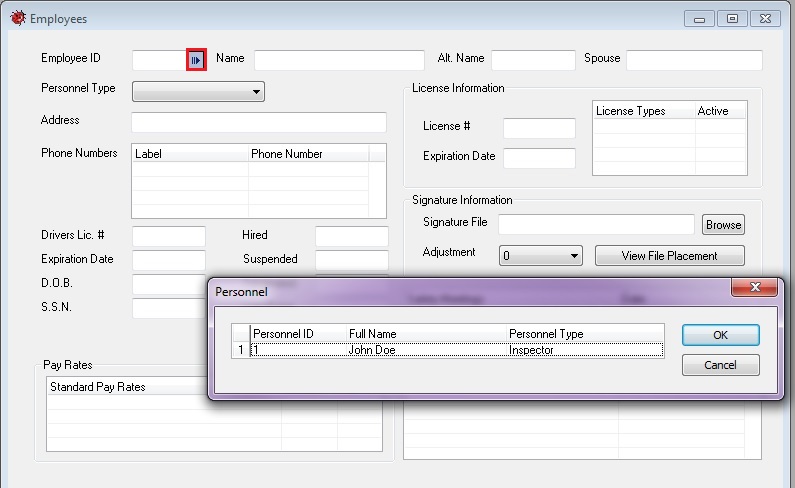
In the Employees window, click on the blue arrow button to the right of the Employee ID text box to see a list of all the employees in your system. Select the employee’s name from the list that you want to add a digital signature to, and click OK.
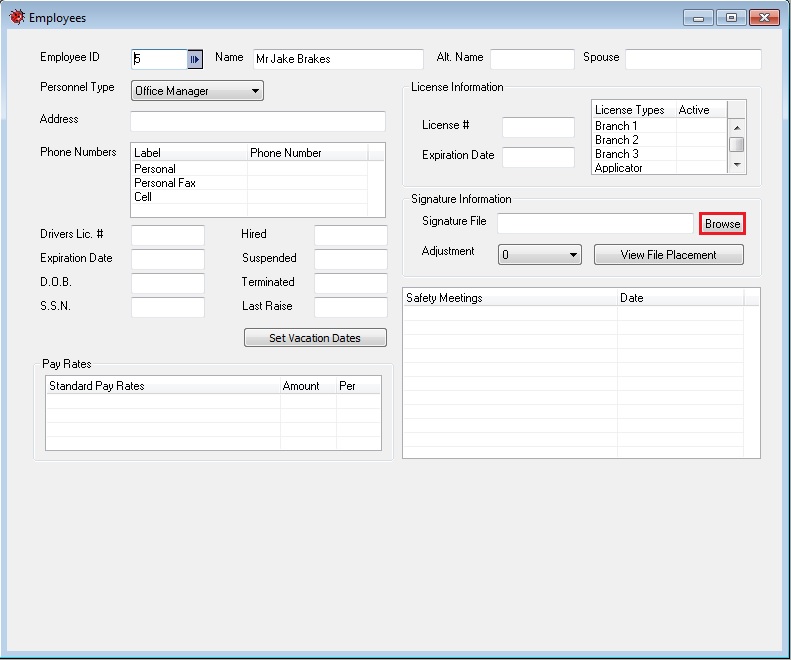
The Employees window should now be filled with the selected employee’s personal information. Click Browse (next to the Signature File text box located on the right hand side of the window) to search for the emplyoee’s signature file.
Locate the folder where you saved your scanned signature, select it, and then click Open.
Click View File Placement to view the Signature Preview window so that you can see what the employee’s signature will look like on all of your printed forms.
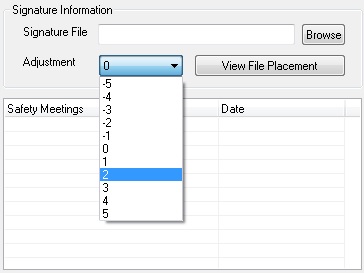
The signature may need to be adjusted based on its distance from the signature line. If it looks a little too high or low, close the Signature Preview window, and within the Employees window, choose a number from the Adjustment drop-down menu (positive numbers move the signature up from the line, negative numbers move it down). Click View File Placement again to see the new Signature Preview. Repeat this process until you get the signature where you want it on the line.
Once the signature is positioned the way you like it, close the Signature Preview window and click Save at the top when finished.